
Understanding Note Types for Jobs
You can now add different types of notes to your jobs in WorkPal. This means when someone reads a note, they'll immediately understand its purpose, whether it's a technical detail, a client request, or an internal update. It's all about making your job information clearer and more informative for everyone involved.
Configuring Your Note Types
To set up and customise these note types, you'll need to head into the Preferences Menu. Here’s how to find it:
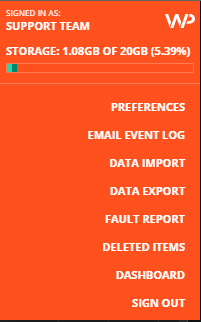
- Simply click on the orange "WP" logo located at the top right of your WorkPal screen.
- From the dropdown list that appears, select "Preferences".
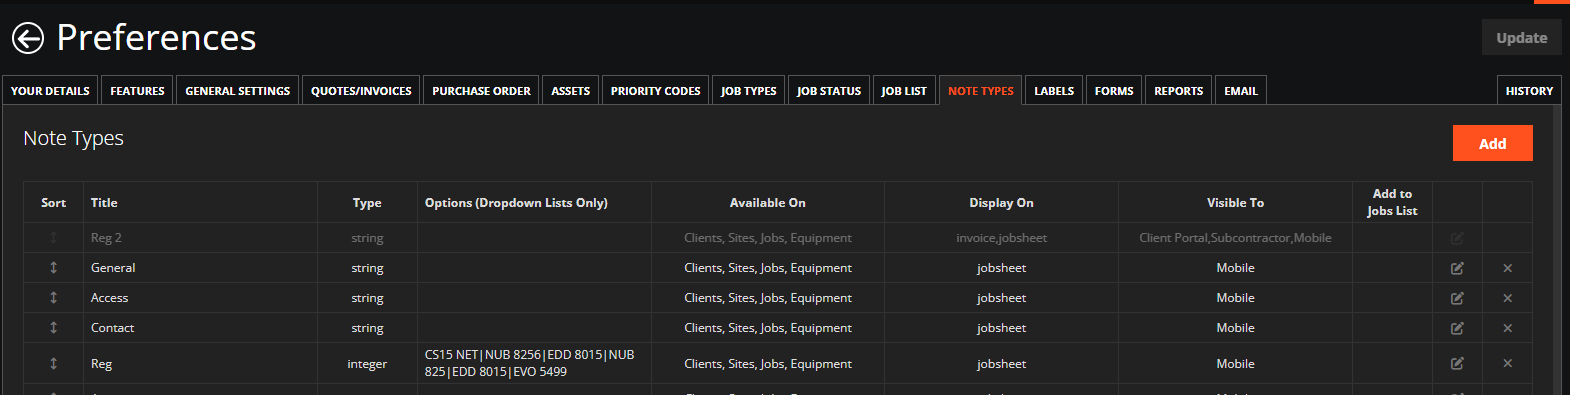
Within the Preferences Menu, you'll find the specific settings for Note Type Preferences, allowing you to define and manage the different categories that best suit your team's workflow.
To Add / Edit or Delete Note Types, Select the Note Types tab in the Preferences Menu.
Adding a new Note Type
To Add a new Note Type, click the "Add" button at the top right of the page.
Defining Data Types for Your Notes
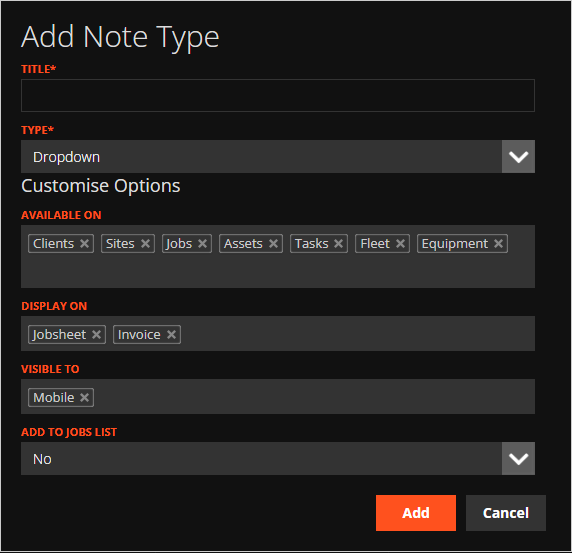
When you're creating a new Note Type in the 'Add Note Type' dialogue, you'll see a range of options for the expected data input. Choosing the correct data type is crucial as it dictates how users will interact with that note and what kind of information they can enter.
Here are the available data types for your custom Note Types:
-
Text: This is your standard input for free-form text. Perfect for general observations, detailed descriptions, or any information that requires a written explanation.
-
Number: Designed specifically for capturing numerical values. This ensures that any data like quantities, measurements, or temperatures are entered consistently and can be used for calculations or reporting.
-
Date: This option provides a date picker, ensuring that all date-related information (e.g., 'next service date', 'inspection date') is entered in a standardised format.
-
Time: Similar to the 'Date' type, this offers a time picker for accurate recording of specific times (e.g., 'arrival time', 'completion time').
-
Date & Time: A combination of the above, allowing users to select both a date and a specific time for comprehensive time-stamped notes.
-
Dropdown: This is excellent for ensuring standardised input by providing a pre-defined list of options for the user to choose from. This eliminates free text errors and speeds up data entry.
-
Auto-Complete: Offers a more dynamic option than 'Dropdown'. As the user starts typing, WorkPal will suggest options from a pre-defined list, helping them quickly select the correct entry while still allowing for a degree of flexibility if the exact option isn't there.
-
Drawing: This innovative option allows users to sketch directly onto the note. Incredibly useful for site diagrams, highlighting issues on a plan, or any scenario where a visual representation is clearer than text.
-
Signature: Essential for formal acknowledgements or approvals. This type enables users to capture a digital signature directly within the note, providing a verifiable record.
Customising Dropdown and Auto-Complete Options
For both the 'Dropdown' and 'Auto-Complete' Note Types, you'll want to pre-populate the list of available choices for your users. This is where the real efficiency comes in, as it ensures consistency and speeds up data entry for common notes.
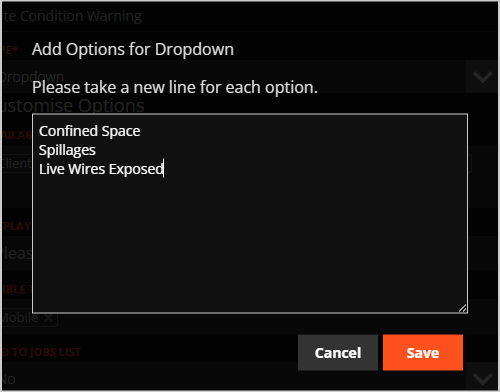
- When you select either 'Dropdown' or 'Auto-Complete' as your Note Type, you'll notice a "Customise Options" button become available.
- Clicking this will open a dedicated section where you can define and manage all the possible options that users will be able to select from. Think of these as your pre-approved list of common text notes, making it quicker for users to add relevant information to a job.
By thoughtfully selecting the appropriate data type for each of your Note Types, you're empowering your team to capture richer, more accurate, and more easily reportable information.
Controlling Your Note Types: Where They Go & Who Sees Them
When you're setting up a new Note Type in WorkPal, you're also deciding where it appears and who can view it. It's about getting the right info to the right people, precisely where it's needed.
Placement & Visibility
- "Available On": This list tells WorkPal which features your note can be attached to (e.g., 'Jobs', 'Assets'). Pick only the relevant ones to keep things tidy.
- "Visible To": Use this to control which user groups can see the note type. Add or remove groups to ensure sensitive info stays private and general updates are shared broadly.
- "Display On": This dictates where the note shows up within the feature it's attached to. Choose a logical spot for easy viewing.
Don't Forget to Save!
Crucially, after any changes to your Note Types, you must click the "Update" button at the top right of the Preferences page. If you don't, your hard work won't be saved!

Now this Note Type can be added to any Feature that is on its "Available To" list.
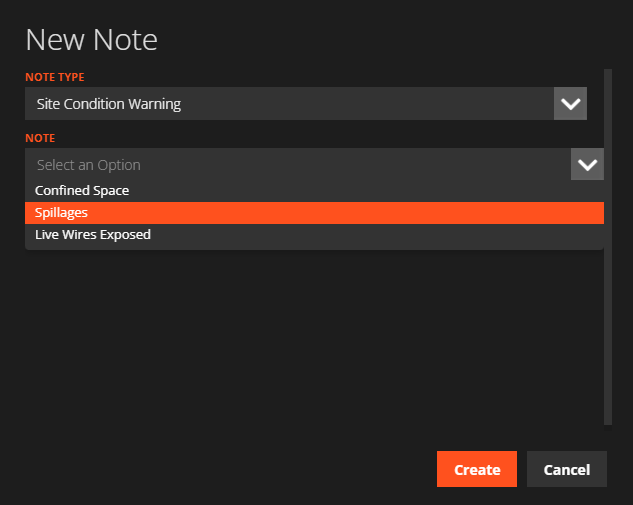
A Dropdown Note:
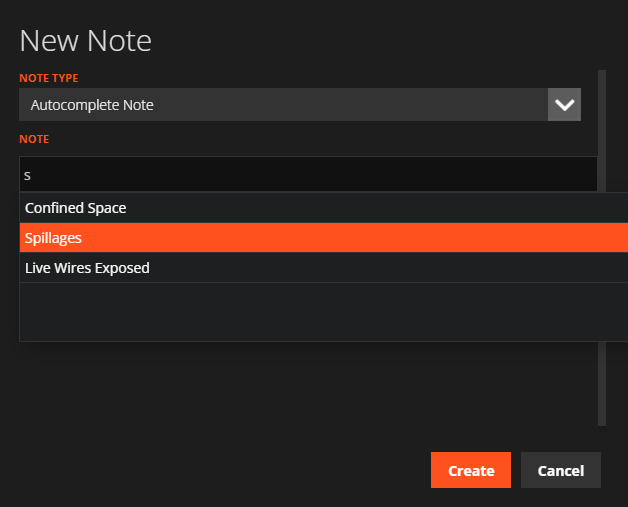
An Autocomplete Note:
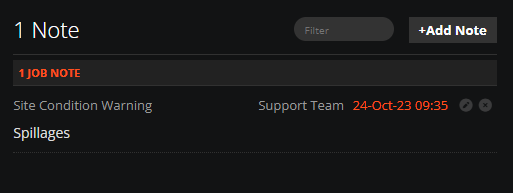
How the Note appears when attached:
Add To Jobs List
The "Add to Jobs List" option for Note Types allows you to use this Note Type as a column filter in the Jobs List.
Only one Note Type can be added to the Job List. Adding a Note Type to the Jobs List will remove the previously assigned Note Type if applicable.
See below where the Site Warning Condition has been added to the Jobs List.
